Tag Archives: Home Improvement

The Essential Tool Kit Guide For Christmas


Notice: Trying to access array offset on value of type null in /dom694484/wp-content/plugins/seo-image/seo-friendly-images.class.php on line 713

Notice: Trying to access array offset on value of type null in /dom694484/wp-content/plugins/seo-image/seo-friendly-images.class.php on line 713

Notice: Trying to access array offset on value of type null in /dom694484/wp-content/plugins/seo-image/seo-friendly-images.class.php on line 713

Notice: Trying to access array offset on value of type null in /dom694484/wp-content/plugins/seo-image/seo-friendly-images.class.php on line 715

Notice: Trying to access array offset on value of type null in /dom694484/wp-content/plugins/seo-image/seo-friendly-images.class.php on line 715

Notice: Trying to access array offset on value of type null in /dom694484/wp-content/plugins/seo-image/seo-friendly-images.class.php on line 718

Notice: Trying to access array offset on value of type null in /dom694484/wp-content/plugins/seo-image/seo-friendly-images.class.php on line 718

Notice: Trying to access array offset on value of type null in /dom694484/wp-content/plugins/seo-image/seo-friendly-images.class.php on line 885

Notice: Trying to access array offset on value of type null in /dom694484/wp-content/plugins/seo-image/seo-friendly-images.class.php on line 886

Notice: Trying to access array offset on value of type null in /dom694484/wp-content/plugins/seo-image/seo-friendly-images.class.php on line 887

Notice: Trying to access array offset on value of type null in /dom694484/wp-content/plugins/seo-image/seo-friendly-images.class.php on line 888

Notice: Trying to access array offset on value of type null in /dom694484/wp-content/plugins/seo-image/seo-friendly-images.class.php on line 889

Holiday Lights

Christmas is rapidly approaching, and for most of us that means it’s time to dig out our decorations, tree and lights, hang up the stockings, and put the advent calendar on display. Getting ready for the holiday season, and decorating and parties that come with it, is not easy. If you dread the thought of trying to get your lights to stay up or your real wood tree to sit correctly in the pot, read on for some simple tips for preparing for the holidays.

Putting Up Your Tree 

If you are working with a real, freshly cut Christmas tree, you should make sure that the tree remains well hydrated while it is in your home. If the tree was cut more than four hours before you erect it in your living room, use a saw to cut one inch of wood off the bottom before putting the tree up.

You should store your tree in a stand that is big enough to hold enough water to satisfy the tree for 24 hours. Freshly cut trees use about a quart of water per inch of trunk diameter per day. Keep the clump of the tree in a strong, galvanized tub, and use a secondary tub to protect the floor from damage caused by excess water and dirt.

Large trees may need stabilizing with a tree stand in addition to their bucket. If the dirt and water in the bucket is not enough to hold the tree in place, consider making a tree stand out of spare wood and eye bolts. Cut four pieces of wood to make the frame (the bigger the tree, the longer the frame should be), and four shorter pieces to make the risers. Use eye bolts to hold the frame together.

Repairing Christmas Lights

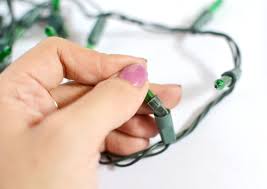
It’s almost inevitable that at least one of the bulbs in your strip of Christmas lights will fail while the lights are in storage. The good news is that it is quite easy to find and replace the broken bulb. Typically, if even one bulb is broken, the entire strip will not light up. To find the broken bulb you will need to use a multi-meter. Unscrew each bulb and test it using the voltage tester setting on the multi-meter. If the voltage tester chirps when you test the bulb, it is working. If the tester is silent, that bulb is blown and must be replaced.

If, after testing all the bulbs, the strip of lights still does not come on, the problem may be with the fuse. Replace the fuse in the plug and try the lights again. 
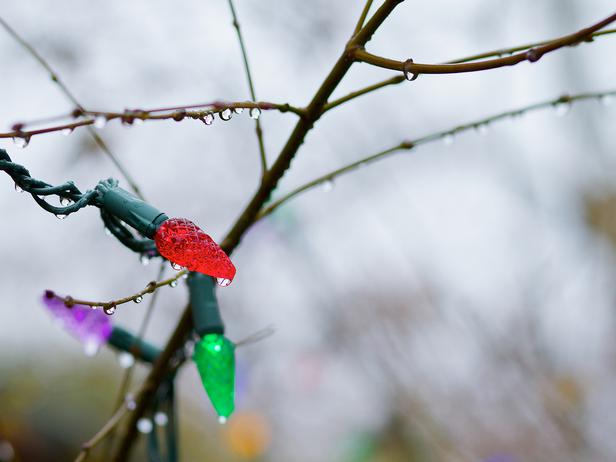
Hanging Your Lights

Take care when hanging lights around your tree. Older incandescent lights can get quite hot and may cause a fire hazard. Consider purchasing LED lights instead. In addition, you must be careful not to damage the wiring of the lights when hanging them on your wall. Do not be tempted to staple or use drawing pins to keep your lights in place. Instead, consider drilling small holes for ornament hooks into the wall and using the hooks to put the lights and other directions in place. Discrete plastic hooks can be used to hang other decorations for other seasonal holiday celebrations.

Making and Hanging Stockings

Hanging Stockings

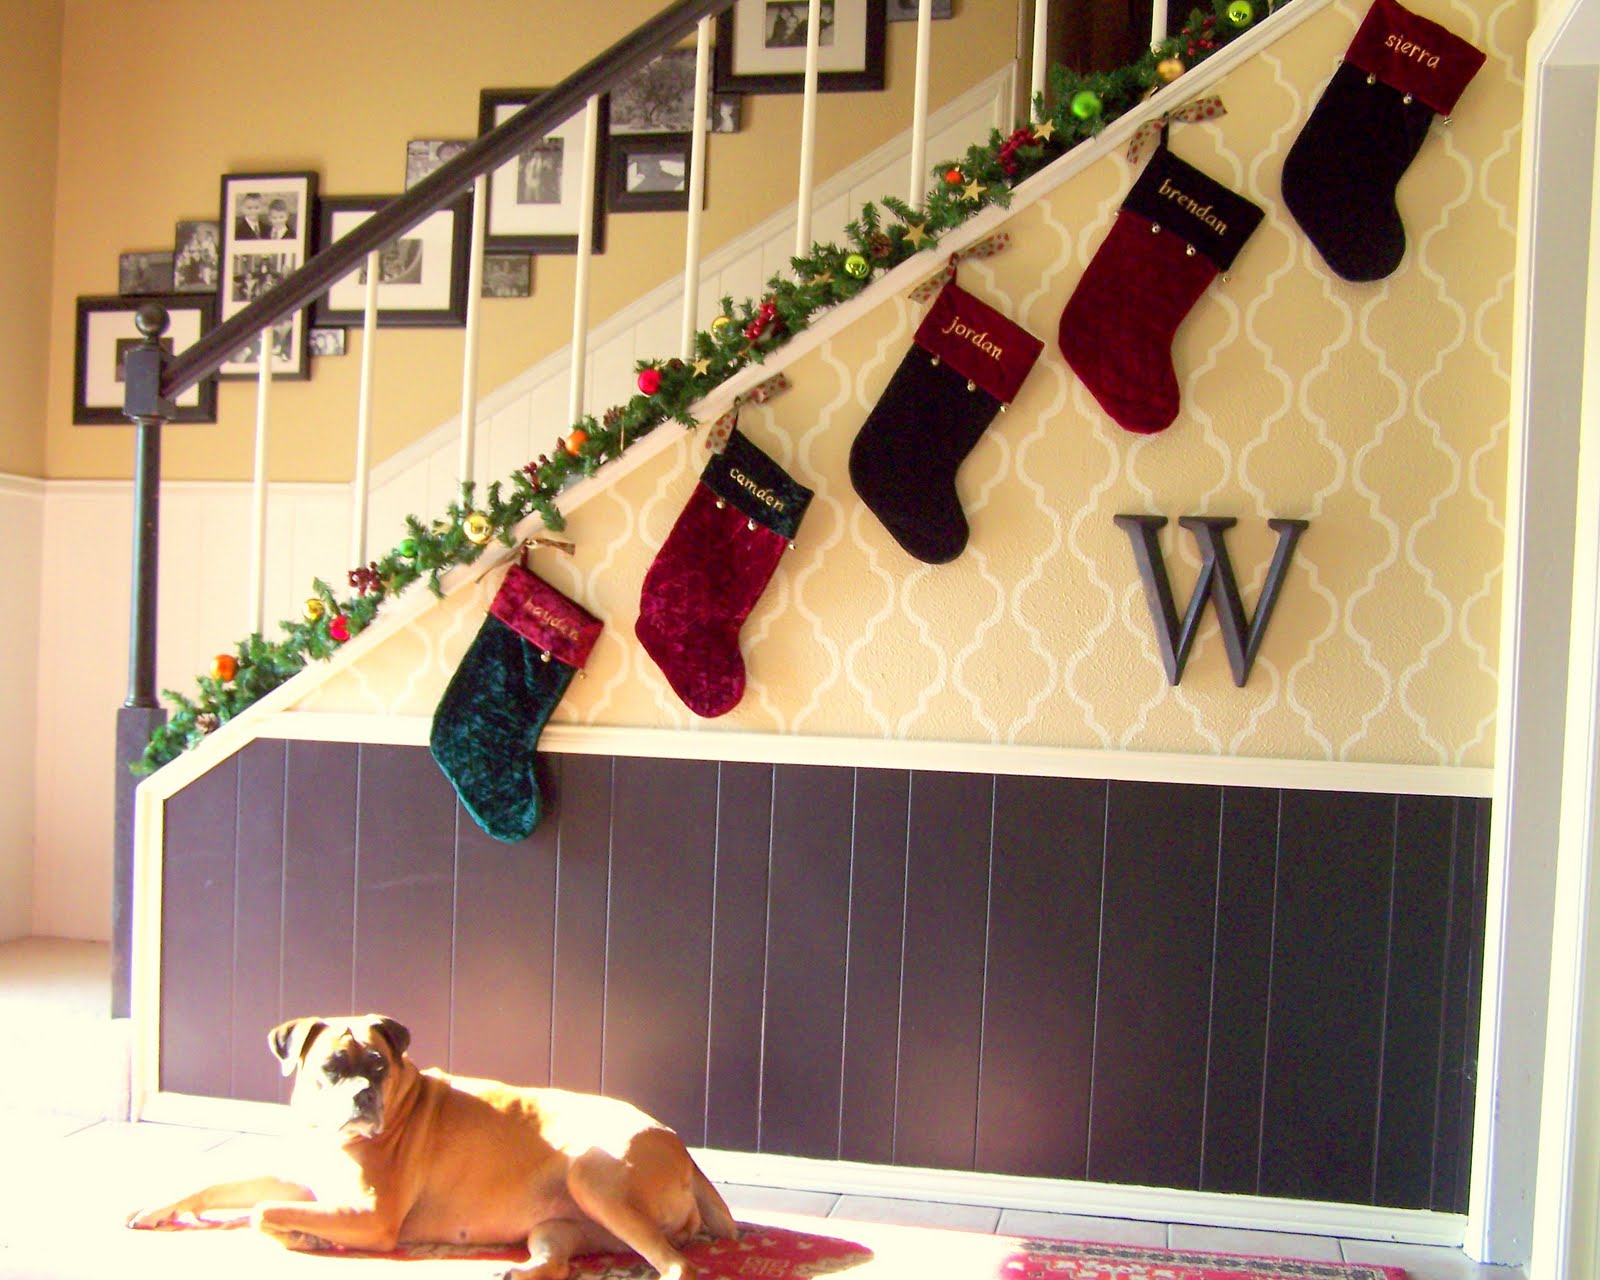
Personalized stockings are easy to make, even if you aren’t talented at needlework. You can find many free stocking patterns online. Simply cut the pattern out of felt, sew it together, and add a strong threaded loop at the top. Make sure that the loop is securely attached to the stocking itself, and that it can handle the weight of any gifts that you plan to put in there.

If you want to hang your stockings on the fireplace, use decorative hooks rather than drawing pins. Non-marking self-adhesive hooks are available from most DIY stores. These hooks are strong enough to support the weight of your stockings, but are easy enough to remove once the holiday season is over, leaving no marks on your wall or fireplace surround.

Making a Card Holder

Christmas Card Holder

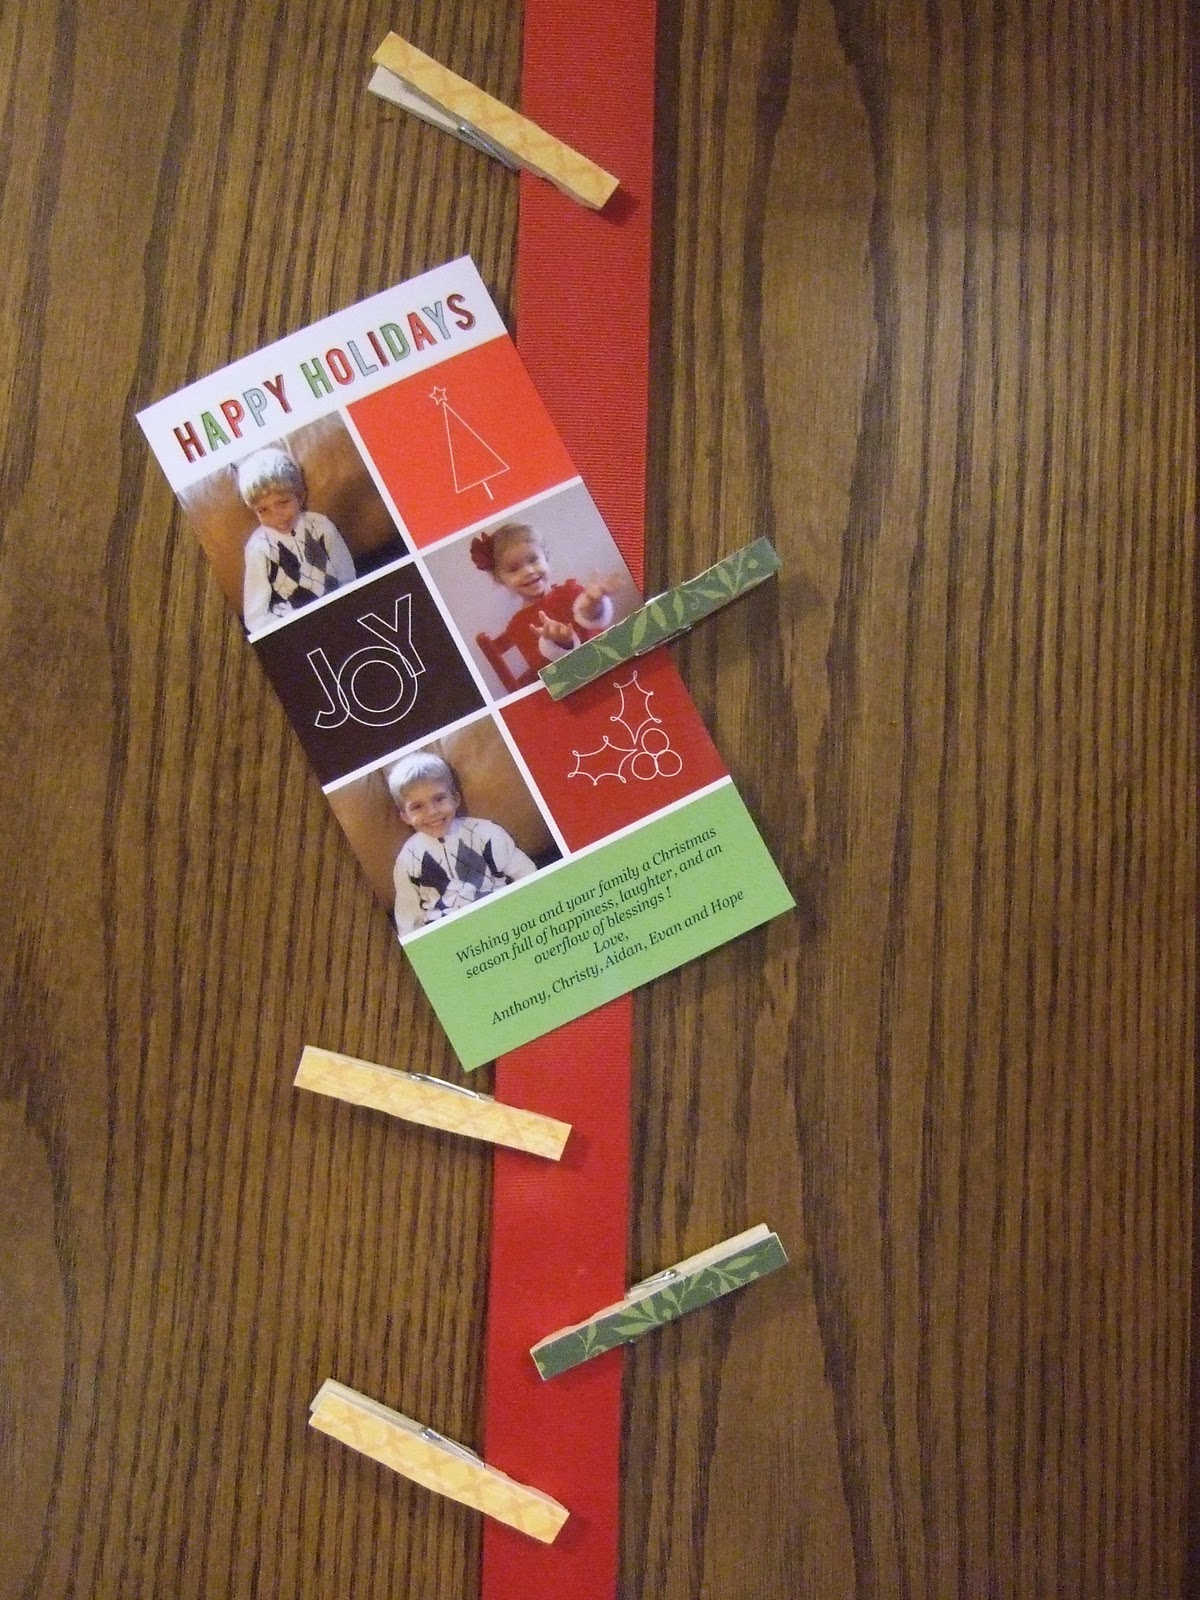
If you get a lot of Christmas cards, then you may struggle to find places to put them. Instead of cluttering your windowsill and fireplace with cards, why not make a festive card hanger?

Take a couple of old wire coat hangers and unfold them, then use pliers to re-shape the hangers into triangles of differing sizes. Tape these triangles together to make a Christmas tree-like shape (With the smallest triangle at the top). At evenly spaced intervals, securely wrap and tape pipe cleaner around the hanger, leaving enough jutting out to hold each Christmas Card in place. Secure the card holder to the wall with two strong hooks.

Your Tool Shopping List

  • Multi-meter
  • Spare fuses
  • Saw
  • Hammer
  • Screwdrivers
  • Tape measure
  • T-Square
  • Drill
  • Scissors
  • A sturdy bucket or galvanized tub
  • Pliers

Enthusiastic DIY fanatic Justine Writes for www.toolorders.co.uk– leading suppliers of high quality tools and machinery.

5 Tips For Safe Holiday Lighting Decorations


Notice: Trying to access array offset on value of type null in /dom694484/wp-content/plugins/seo-image/seo-friendly-images.class.php on line 713

Notice: Trying to access array offset on value of type null in /dom694484/wp-content/plugins/seo-image/seo-friendly-images.class.php on line 713

Notice: Trying to access array offset on value of type null in /dom694484/wp-content/plugins/seo-image/seo-friendly-images.class.php on line 713

Notice: Trying to access array offset on value of type null in /dom694484/wp-content/plugins/seo-image/seo-friendly-images.class.php on line 715

Notice: Trying to access array offset on value of type null in /dom694484/wp-content/plugins/seo-image/seo-friendly-images.class.php on line 715

Notice: Trying to access array offset on value of type null in /dom694484/wp-content/plugins/seo-image/seo-friendly-images.class.php on line 718

Notice: Trying to access array offset on value of type null in /dom694484/wp-content/plugins/seo-image/seo-friendly-images.class.php on line 718

Notice: Trying to access array offset on value of type null in /dom694484/wp-content/plugins/seo-image/seo-friendly-images.class.php on line 885

Notice: Trying to access array offset on value of type null in /dom694484/wp-content/plugins/seo-image/seo-friendly-images.class.php on line 886

Notice: Trying to access array offset on value of type null in /dom694484/wp-content/plugins/seo-image/seo-friendly-images.class.php on line 887

Notice: Trying to access array offset on value of type null in /dom694484/wp-content/plugins/seo-image/seo-friendly-images.class.php on line 888

Notice: Trying to access array offset on value of type null in /dom694484/wp-content/plugins/seo-image/seo-friendly-images.class.php on line 889

Part of the magic of the holidays is decking your home out with lighted displays of splendor. As much fun as holiday decorating is, it can turn into disaster when safety is an afterthought. During this time of year, people get electrocuted, they fall from high places and their homes burn to a crisp because they are not careful while putting up their lighted displays.

Say bye-bye to ragged cords

Damaged Electrical Cord

Plugging in decorations that have frayed or damaged cords is a fire hazard waiting to happen. If you find lights with damaged cords, don’t try to rewire them or fix them with tape. These measures will not make the lights useable. Rigging the electrical cords on your decorations will only increase the potential for fire or electrocution. Do yourself a favor. If you find cords that look like rats have nibbled on them, put them in the trash.

Broken bulbs beware

Fix Christmas Lights

If you find lighted decorations with broken or blown bulbs, replace them with bulbs of the same wattage. If you can’t find bulbs to fit your decorations, call the manufacturer and they can either send you the right bulbs or tell you where to buy them. Always unplug the lights before you replace the bulbs. Just because the light is not working doesn’t mean it won’t electrocute you.

Get grounded

GFCI Electrical Ground Outlet

Plug all your outdoor lights into a GFIC or ground-fault circuit interrupter. This device looks like a regular electrical outlet, but it is designed to protect you from electrical shock. An electrician can install one for you or you can buy a portable unit at a home improvement store.

No substitutes

Outdoor Use

There are different types of lights for indoor and outdoor use. Do not try to substitute one for the other. If the package says “interior use” the product is for indoor use. If the package says “exterior use” the lights are for outdoor use only. Unless otherwise noted on the package, indoor and outdoor lights are not interchangeable.

Outdoor lights are designed to hold up to cold and wet weather and they get hotter than indoor lights. Indoor lights are safety tested for use on holiday trees. If you use them outside, they might break down and become a fire or electrocution hazard. If you are using lights from last year and are not able to determine whether they are interior or exterior, don’t use them.

Grab a partner

If you are hanging your lights in high places, have someone hold the ladder for you. When you have someone assisting you, he can call for help if you have an accident while you are hanging your decorations.

With the hustle and bustle of the holiday season, it’s easy to get wrapped up in decorating and forget about safety. Although holiday lights are beautiful, being careless or hanging them improperly can lead to disaster. While you are decking out your tree, house and yard with festive lights, follow the above tips to stay safe.

+Paul Reichman is the founder of BedBathStore. Using decades of experience in home fashion, Paul offers quality bed, bath and home furnishings at affordable prices through www.bedbathstore.com.

Bringing the Craftsman Style to Your House Plan


Notice: Trying to access array offset on value of type null in /dom694484/wp-content/plugins/seo-image/seo-friendly-images.class.php on line 713

Notice: Trying to access array offset on value of type null in /dom694484/wp-content/plugins/seo-image/seo-friendly-images.class.php on line 713

Notice: Trying to access array offset on value of type null in /dom694484/wp-content/plugins/seo-image/seo-friendly-images.class.php on line 713

Notice: Trying to access array offset on value of type null in /dom694484/wp-content/plugins/seo-image/seo-friendly-images.class.php on line 715

Notice: Trying to access array offset on value of type null in /dom694484/wp-content/plugins/seo-image/seo-friendly-images.class.php on line 715

Notice: Trying to access array offset on value of type null in /dom694484/wp-content/plugins/seo-image/seo-friendly-images.class.php on line 718

Notice: Trying to access array offset on value of type null in /dom694484/wp-content/plugins/seo-image/seo-friendly-images.class.php on line 718

Notice: Trying to access array offset on value of type null in /dom694484/wp-content/plugins/seo-image/seo-friendly-images.class.php on line 885

Notice: Trying to access array offset on value of type null in /dom694484/wp-content/plugins/seo-image/seo-friendly-images.class.php on line 886

Notice: Trying to access array offset on value of type null in /dom694484/wp-content/plugins/seo-image/seo-friendly-images.class.php on line 887

Notice: Trying to access array offset on value of type null in /dom694484/wp-content/plugins/seo-image/seo-friendly-images.class.php on line 888

Notice: Trying to access array offset on value of type null in /dom694484/wp-content/plugins/seo-image/seo-friendly-images.class.php on line 889

In the first two decades of the 20th century, designers including Frank Lloyd Wright and Gustav Stickley created a new Craftsman house plan style, which valued originality, high-quality craftsmanship, and functionality. These and other Craftsman designers envisioned a home style that would bring the average person closer to nature, through contact with natural materials—stone, timber, and glass are the stars of Craftsman styling. Partially a rebellion against ornate Victorian design, Craftsman homes featured clean lines and simplicity of design, with geometric shapes dominating. Designers also focused on maximizing functionality; hence the predominance of built-in storage, niche benches, and breakfast nooks in Craftsman house plans.

Craftsman homes thrived because they were affordable for middle-class families, who often built some or all of their Craftsman homes themselves by hand. Through 1940, Sears, Roebuck and Company sold entire home plan and material kits, which were shipped to homeowners by railroad and erected on site, by contractors or by families.

Today, Craftsman home styling has stood the test of time; this design approach enjoys perennial popularity among homeowners and designers alike. No wonder, as Craftsman homes featured many of the elements today’s homeowners cherish: Open floor plans, environmental friendliness, affordability, and built-in organization.

Because of the simplicity of Craftsman styling, it’s not difficult to add Craftsman flair to any home. Read on for a few ways to bring the Craftsman spirit into your existing home or house plans.

Craftsman House Plan Kitchen

How to Add Craftsman Styling to Any Home

As any designer will tell you, transforming a home into a certain style is all in the details. So, you can make your “Craftsman-ization” as small or as grand as you like. Simply switching out cabinet fixtures will immediately add a new feel to your kitchen, for instance. On the other end of the time/money investment spectrum, you can replace your roof with one that features dormers and wide eaves. Whatever you do, make sure your choices reflect the square lines, solid materials, and emphasis on clean functionality that embodies the Craftsman style.

Add built-ins

Craftsman designers recognized that built-in bookcases, dining nooks, window seats, and benches added functionality for homeowners.

Change out fixtures

Craftsman lights were simple, often composed of iron or bronze and glass, in rectangular and square shapes. Cabinet and furniture hardware tended to be in copper or brass, with hammered, oil-rubbed or polished finishes. Again, geometric styling dominates.

Add a new backsplash

Hand-made tiles were included in many original Craftsman homes. Your kitchen backsplash is a great way to express this aspect of Craftsman styling. Solid colors and natural motifs are common in Craftsman tile work.

Add interior paint in earth tones

Earth tones are especially appropriate for the Craftsman style, which aimed to highlight the natural beauty of materials such as stone and wood. Creamy white, beige, green, brown, blue, and gray are common colors found the average Craftsman home plan.

Install moldings

This finished carpentry detail of bygone eras will make any room feel more removed from contemporary life. Choose crown moldings (around the top of the room) or wainscoting moldings (at waist height).

Add Craftsman details to your fireplace

Add colored tile surrounded by a heavy wood mantle. Placing built-in bookcases on either side of a heavy wood mantle is especially Craftsman.

Put in a breakfast nook

Eat-in Craftsman kitchens represented a break with older Victorian designs, which usually aimed to hide the kitchen from view. A carpenter or home designer can easily incorporate a wood breakfast nook in your home design, provided you have the space.

Add stained glass panels

Original Craftsman homes often featured stained glass windows, which add privacy and beauty. If cost is a barrier, Craftsman style window sticks are available.

Install natural wood floors

Craftsman homes tended to have practical, easy-to-clean wood floors, with cozy rugs.

Replace the front door

Whether consciously or subconsciously, the entryway is how many people assess a home’s style. Craftsman homes tend to have wood doors with simple flat panels, shelves, and square detailing.

Feature Craftsman furniture

Period furniture tended to be wood (walnut, oak, and mahogany in particular), with simple geometric lines, spindles and slats, and hand-hammered copper hardware. (Again, we see the focus on handmade craft.)

Change the roofline

You can create a Craftsman roof style by adding deep eaves with exposed rafters and square brackets. Dormers are also common in Craftsman home plans.

Add on a front porch

The Craftsman porch was covered by an extension of the front roof, and supported by tapered square columns.

Weekend project by weekend project, with enough effort you can transform nearly any home into an expression of Craftsman style. The simplicity and warmth of the 1920s Craftsman homes provided a respite from the newly modern surroundings of the turn of the 20th century. Now the same Craftsman charm can help you relax and unplug from modern life.

Post and photos courtesy of Houseplans.co , the online home of Alan Mascord Design Associates, where visitors can find more than 700 gorgeous house plans, including styles from Contemporary to Craftsman house plans.

Innovative Uses For The Space Under A Staircase


Notice: Trying to access array offset on value of type null in /dom694484/wp-content/plugins/seo-image/seo-friendly-images.class.php on line 713

Notice: Trying to access array offset on value of type null in /dom694484/wp-content/plugins/seo-image/seo-friendly-images.class.php on line 713

Notice: Trying to access array offset on value of type null in /dom694484/wp-content/plugins/seo-image/seo-friendly-images.class.php on line 713

Notice: Trying to access array offset on value of type null in /dom694484/wp-content/plugins/seo-image/seo-friendly-images.class.php on line 715

Notice: Trying to access array offset on value of type null in /dom694484/wp-content/plugins/seo-image/seo-friendly-images.class.php on line 715

Notice: Trying to access array offset on value of type null in /dom694484/wp-content/plugins/seo-image/seo-friendly-images.class.php on line 718

Notice: Trying to access array offset on value of type null in /dom694484/wp-content/plugins/seo-image/seo-friendly-images.class.php on line 718

Notice: Trying to access array offset on value of type null in /dom694484/wp-content/plugins/seo-image/seo-friendly-images.class.php on line 885

Notice: Trying to access array offset on value of type null in /dom694484/wp-content/plugins/seo-image/seo-friendly-images.class.php on line 886

Notice: Trying to access array offset on value of type null in /dom694484/wp-content/plugins/seo-image/seo-friendly-images.class.php on line 887

Notice: Trying to access array offset on value of type null in /dom694484/wp-content/plugins/seo-image/seo-friendly-images.class.php on line 888

Notice: Trying to access array offset on value of type null in /dom694484/wp-content/plugins/seo-image/seo-friendly-images.class.php on line 889

Does your home featuring a staircase leading up to the second level? If so, you should consider taking advantage of the additional space underneath this area. While millions of homes are built with staircases, very few homeowners actually use this additional space underneath them. However, properly decorating and setting up this otherwise wasted space will offer multiple benefits. For some ideas on how to use the space under a staircase, keep reading.

#1 – Home Office

Under Stairs Home Office Storage

One solution that’s incredibly easy and efficient is to turn the area into a functional home office. Depending on the size and shape of your staircase, this may or may not be easy. Traditional non-spiral staircases will typically feature a large space underneath that can turned into a desk area complete with an office chair and file cabinet. All that’s required to accomplish this is to install a desk, electrical outlet and light in the space. Congratulations, you now have your very own office set up directly under the stairs!

#2 – Storage

Hidden Storage Under Staircase Storage

Another innovate use for the space under a staircase is to transform it into a storage area. If you can’t seem to find enough room to store all of your clothes and belongings, then you should turn this area into a storage area. There are several different ways to approach this, but the easiest technique is to install drawers into the staircase. You’ll likely have to custom design them, but it’s well worth it in the long run. Once the drawers are installed under the stairs, you can store additional clothes, books, DVDs, electronics, remote controls, mail or practically anything else you can think of.

#3 – Bookshelf

Under Staircase Book Shelf Storage

A third option is to turn the additional space into a large bookshelf. This technique is especially beneficial for staircases in the foyer and/or living room. Bookshelves offer a unique decorative touch to the atmosphere that’s simply not found in other furnishings. Installing one in the open communal area such as a foyer staircase will provide a stylish touch, helping to achieve a more attractive and complete home decor.

You can even go one step further by installing multiple bookshelves in this area, essentially creating a small library. Individuals who enjoy reading books the old fashioned way rather than tablets will likely enjoy this technique. Libraries are rarely found in modern-day homes, so friends and family members are sure to compliment you on it.

#4 – Lounging Area

Under the Stairs Seating

As long as there’s enough space, you can turn the area underneath a staircase into a full lounge area. The dark, cozy atmosphere is perfect for kicking back and relaxing. Just add a comfortable daybed along with some pillows and you’ll have a wonderfully relaxing lounge area. Lounge areas are ideal for kicking back and catching a daytime nap.

While most people will be resting in their lounge area, it’s still a good idea to install a light socket here. Having a light in your newly created lounge area will give you more freedom and options regarding its use.

Evan is a content contributor for Stair Supplies. Evan enjoys writing about home improvement projects and much more. He suggests going here to find the best stair parts available online.

Electricians Tell Their Secrets: 5 Of The Worst DIY Attempts


Notice: Trying to access array offset on value of type null in /dom694484/wp-content/plugins/seo-image/seo-friendly-images.class.php on line 713

Notice: Trying to access array offset on value of type null in /dom694484/wp-content/plugins/seo-image/seo-friendly-images.class.php on line 713

Notice: Trying to access array offset on value of type null in /dom694484/wp-content/plugins/seo-image/seo-friendly-images.class.php on line 713

Notice: Trying to access array offset on value of type null in /dom694484/wp-content/plugins/seo-image/seo-friendly-images.class.php on line 715

Notice: Trying to access array offset on value of type null in /dom694484/wp-content/plugins/seo-image/seo-friendly-images.class.php on line 715

Notice: Trying to access array offset on value of type null in /dom694484/wp-content/plugins/seo-image/seo-friendly-images.class.php on line 718

Notice: Trying to access array offset on value of type null in /dom694484/wp-content/plugins/seo-image/seo-friendly-images.class.php on line 718

Notice: Trying to access array offset on value of type null in /dom694484/wp-content/plugins/seo-image/seo-friendly-images.class.php on line 885

Notice: Trying to access array offset on value of type null in /dom694484/wp-content/plugins/seo-image/seo-friendly-images.class.php on line 886

Notice: Trying to access array offset on value of type null in /dom694484/wp-content/plugins/seo-image/seo-friendly-images.class.php on line 887

Notice: Trying to access array offset on value of type null in /dom694484/wp-content/plugins/seo-image/seo-friendly-images.class.php on line 888

Notice: Trying to access array offset on value of type null in /dom694484/wp-content/plugins/seo-image/seo-friendly-images.class.php on line 889

man

Image by: sturti

Over 14 million men in Britain have admitted that, when DIY work has gone wrong, it resulted in wrecking their home. More than half confessed to still having at least one DIY project unfinished in their property. Each job on average totals up to £170 – which means that there’s an enormous 2 million pounds worth of DIY fix ups to be done in the UK!

Most people prefer to do their own handy work instead of calling in the professionals. This may seem a cheaper alternative since it would save money to do it yourself rather than paying somebody to do the same job.

But this is how DIY disasters are caused. Electrician Martin from MF Electrical in Heanor agrees: “It is whether it has been done safely and won’t endanger a life. Is it worth taking the risk rather than getting a professional in to do it?”

We asked some professional electricians about some of the worst DIY attempts they had seen. Here’s what they had to say.

Dangerous

“A couple had an immersion heater wired in coax TV cable, an 8.5kw shower wired in orange lawn mower flex. One of the classics we used to see regularly was tin foil wrapped round the old style cartridge fuse in fuse boxes.” – Martin from MF Electrical in Heanor

“I think the worst thing that I’ve found would be a ‘junction box’ in a loft. This was basically the connections snapped out of a light fitting and left underneath loft insulation live and with all the live parts exposed.” – Kirsty from Kirsty Cockerill Electrical

“My friend’s husband took some power out to the garden deck. He ran a socket out there and then ran some lights off that. He did it all in 1mm lighting cable and didn’t consider IP ratings (protection from moisture). He plugged in a couple of heaters. There was a big bang!” – Karen from She’s Electric

Bizarre

“I was called out to a home where the lady of the house was getting a shock as she washed her hair in the kitchen sink. It turned out to be a DIY light at the bottom of the stairs her husband had installed – I’ll leave it up to you to decide whether or not it was intentional!” – Roger from C.J. Timms

“Joists catching fire, since the builder drilled half of it out so that his downlight would fit, sockets and showers with no earth, whole houses with no earthing, circuit tripping as a socket under sink was full of spilled fabric conditioner.” – Donna from ATB Electrical

So now you know how not to do it, here are few sage words of wisdom from those electrical pros in the know. 

Helpful Tips

“If you have an old-style fuse box, get it replaced. It could save you and your family’s lives.” – Roger from C.J. Timms

“Never risk it and check it yourself. Most electricians will give you free advice, so if in doubt just give someone a call. It could end up costing you more in the long run if you try to fix it yourself.” – Kirsty from Kirsty Cockerill Electrical

“Just because it works doesn’t necessarily mean its safe. If you are at all worried about your electrics, get them properly tested.” – Donna from ATB Electrical

So what’s the moral of the story, boys and girls? Don’t try attempting any DIY work if you’re not 100% what you’re doing. You may end up paying out more to repair any faulty D.I.Y than actually having a professional do it for you.

Have you ever had a disastrous DIY attempt? Or got any of your own tips? Let me know in the comments below.

Sarah Garvey has a fair share of knowledge of electrician DIY work, especially about ICT and from her own personal experience. She recommends Alert Electrical.

Top Five Reasons Why You Shouldn’t ‘Do It Yourself’ When It Comes To House Painting


Notice: Trying to access array offset on value of type null in /dom694484/wp-content/plugins/seo-image/seo-friendly-images.class.php on line 713

Notice: Trying to access array offset on value of type null in /dom694484/wp-content/plugins/seo-image/seo-friendly-images.class.php on line 713

Notice: Trying to access array offset on value of type null in /dom694484/wp-content/plugins/seo-image/seo-friendly-images.class.php on line 713

Notice: Trying to access array offset on value of type null in /dom694484/wp-content/plugins/seo-image/seo-friendly-images.class.php on line 715

Notice: Trying to access array offset on value of type null in /dom694484/wp-content/plugins/seo-image/seo-friendly-images.class.php on line 715

Notice: Trying to access array offset on value of type null in /dom694484/wp-content/plugins/seo-image/seo-friendly-images.class.php on line 718

Notice: Trying to access array offset on value of type null in /dom694484/wp-content/plugins/seo-image/seo-friendly-images.class.php on line 718

Notice: Trying to access array offset on value of type null in /dom694484/wp-content/plugins/seo-image/seo-friendly-images.class.php on line 885

Notice: Trying to access array offset on value of type null in /dom694484/wp-content/plugins/seo-image/seo-friendly-images.class.php on line 886

Notice: Trying to access array offset on value of type null in /dom694484/wp-content/plugins/seo-image/seo-friendly-images.class.php on line 887

Notice: Trying to access array offset on value of type null in /dom694484/wp-content/plugins/seo-image/seo-friendly-images.class.php on line 888

Notice: Trying to access array offset on value of type null in /dom694484/wp-content/plugins/seo-image/seo-friendly-images.class.php on line 889

In these times of economic hardship, it is often very tempting to do as many things as you can yourself when it comes to home improvement or household tasks, rather than paying the professionals to do it for you. In many cases this is absolutely fine and does make monetary sense, but when it comes to external house painting, it can very much be a false economy. There are a number of reasons why this is the case and this article will run you through the top five in the hope that you will be dissuaded from making the mistake of trying to take the task on your own shoulders.

You Should Never Bite off More than you Can Chew

Bite Off More Than You Can Chew

The fact of the matter is that some decorating jobs are a lot simpler than they first appear, but exterior house painting does not fit within this category. To get a good, or even an acceptable final result takes a great deal of expertise and skill. If you do not have the experience of carrying out house painting regularly then you are unlikely to possess the prerequisite skills.

Do You Really Have Time?

If you look at the exterior of your home it may be easy to misapprehend just how large the surface area that requires painting really is. If you take the time to really think about it you will realize that there is in fact a lot of coverage required and, when you consider that more than one coat is likely to be required, you start to get the picture of just how much time you will have to set aside to paint it yourself. Add to this the fact that any work done at height invariably takes a lot longer and you really do have to ask yourself whether you really have time to do it yourself.

The Weather is a Factor

Feeding into the fact that doing it yourself will take longer than having your house painted professionally, is the fact that you have to consider the weather as an extra factor. You simply cannot re-paint exterior walls in the rain or wet weather and, as such, the quicker that you can get the job done when the sun does shine, the better hope you have of everything being finished and dry before the next shower.

It May Not be as Cheap as You Think

SavingWhilst the main reason you may be tempted to paint your house yourself would be the fact that you believe it will be cheaper than bringing in the professionals, you may be surprised at how little difference there may be. This is true as, unless you happen to have the kind of specialist equipment and ladders required for working at height, buying these can be very expensive and almost wholly destroy any economic benefits of doing the job yourself.

Working at Height is Hard

A final point to remember is that even if you don’t believe to have a fear of heights, doing work and decorating at height is difficult and, if not done correctly, can be dangerous. If you have any concerns in this kind of area then you shouldn’t, therefore, even consider taking on the task of painting the exterior of your house yourself.

James is a writer, blogger and DIY expert having cut his teeth at Never Paint Again. An exernal wall covering and coating specialist in Plymouth, Devon.

5 Simple Steps to an Organized Garage


Notice: Trying to access array offset on value of type null in /dom694484/wp-content/plugins/seo-image/seo-friendly-images.class.php on line 713

Notice: Trying to access array offset on value of type null in /dom694484/wp-content/plugins/seo-image/seo-friendly-images.class.php on line 713

Notice: Trying to access array offset on value of type null in /dom694484/wp-content/plugins/seo-image/seo-friendly-images.class.php on line 713

Notice: Trying to access array offset on value of type null in /dom694484/wp-content/plugins/seo-image/seo-friendly-images.class.php on line 715

Notice: Trying to access array offset on value of type null in /dom694484/wp-content/plugins/seo-image/seo-friendly-images.class.php on line 715

Notice: Trying to access array offset on value of type null in /dom694484/wp-content/plugins/seo-image/seo-friendly-images.class.php on line 718

Notice: Trying to access array offset on value of type null in /dom694484/wp-content/plugins/seo-image/seo-friendly-images.class.php on line 718

Notice: Trying to access array offset on value of type null in /dom694484/wp-content/plugins/seo-image/seo-friendly-images.class.php on line 885

Notice: Trying to access array offset on value of type null in /dom694484/wp-content/plugins/seo-image/seo-friendly-images.class.php on line 886

Notice: Trying to access array offset on value of type null in /dom694484/wp-content/plugins/seo-image/seo-friendly-images.class.php on line 887

Notice: Trying to access array offset on value of type null in /dom694484/wp-content/plugins/seo-image/seo-friendly-images.class.php on line 888

Notice: Trying to access array offset on value of type null in /dom694484/wp-content/plugins/seo-image/seo-friendly-images.class.php on line 889

The garage is one of the most underutilized areas in the home. Many times people begin to place boxes, totes, and miscellaneous items in their garage. Soon enough, the garage becomes a cluttered dumping ground for the whole family. The garage is the optimal space to store and organize your family’s things and should be fully taken advantage of. Here are a few simple steps to an organized and functional garage.

Decision Time:

The first step to an organized garage is making decisions. If an item hasn’t been used in the last 3 years, chances are you’ll never use it in the next 3 years. Make decisions based on this rule of thumb to rid yourself of a lot of unnecessary clutter. Separate items in a “keep” pile and a “donate” pile.

Donate:

Once you’ve separated your things, donate gently used and useful items to your local charity. Donating to a local charity is a great way to give back to your community, recycle and receive a tax deduction. Who wouldn’t find those reasons appealing? Now, you’re ready to start organizing your garage!

Designate:

Now that you’re left with the items you could never part with, it’s time to assign them to a designated spot. Sports equipment, off-season items, tools, and yard equipment should all have a space of their own to call home.

Bins and Labels:

Store things in clear plastic bins to easily identify its contents. If you prefer a more uniform look, store things in a colored bin and label them according to their contents.

Bring Everything Up:

Garage Storage System

In order to maximize on your available space and create more usable square footage, store things up on the wall, above windows and doors and from the ceiling. Utilize shelving, hooks and overhead racks to take advantage of wall and overhead space to store things up and out of the way.

Store off-season and less frequently used items up high. This keeps them out of the way while still allowing for easy access when they are needed. Store more frequently used items, such as kids’ toys and sports equipment and yard tools lower on the wall and in cabinets for daily easy access.

By taking full advantage of your garage you will discover just how much space it actually has to offer. By storing and organizing your items up off the floor you will once again feel in control of your garage.

Monkey Bars Garage Storage Systems is a garage storage and organization company serving Sacramento homeowners with solutions and tips for an organized garage.

Above-Ground Versus In-Ground Swimming Pools


Notice: Trying to access array offset on value of type null in /dom694484/wp-content/plugins/seo-image/seo-friendly-images.class.php on line 713

Notice: Trying to access array offset on value of type null in /dom694484/wp-content/plugins/seo-image/seo-friendly-images.class.php on line 713

Notice: Trying to access array offset on value of type null in /dom694484/wp-content/plugins/seo-image/seo-friendly-images.class.php on line 713

Notice: Trying to access array offset on value of type null in /dom694484/wp-content/plugins/seo-image/seo-friendly-images.class.php on line 715

Notice: Trying to access array offset on value of type null in /dom694484/wp-content/plugins/seo-image/seo-friendly-images.class.php on line 715

Notice: Trying to access array offset on value of type null in /dom694484/wp-content/plugins/seo-image/seo-friendly-images.class.php on line 718

Notice: Trying to access array offset on value of type null in /dom694484/wp-content/plugins/seo-image/seo-friendly-images.class.php on line 718

Notice: Trying to access array offset on value of type null in /dom694484/wp-content/plugins/seo-image/seo-friendly-images.class.php on line 885

Notice: Trying to access array offset on value of type null in /dom694484/wp-content/plugins/seo-image/seo-friendly-images.class.php on line 886

Notice: Trying to access array offset on value of type null in /dom694484/wp-content/plugins/seo-image/seo-friendly-images.class.php on line 887

Notice: Trying to access array offset on value of type null in /dom694484/wp-content/plugins/seo-image/seo-friendly-images.class.php on line 888

Notice: Trying to access array offset on value of type null in /dom694484/wp-content/plugins/seo-image/seo-friendly-images.class.php on line 889

If you and your family are ready to have a pool installed in your backyard so that you can invite all of your friends and family over to enjoy it with you throughout the hot summer season when one of the best things to do is go for a swim to cool off and have fun, you have two choices: above-ground and in-ground pools. This choice may be difficult, and you may have already given it quite some thought but come up empty when it is time to really come to a decision.

To help you determine whether an in-ground pool or an above-ground pool is really best for your backyard, continue reading for the pros and cons associated with each.

Costs

In-ground pools are much more expensive than above-ground pools because they need to be installed directly into the ground in your backyard. Therefore, if you are on a tight budget, an above-ground pool may be your only option. Just keep in mind that, at least for the short-term, an above-ground pool may be more affordable. But in the long run, a durable and long-lasting in-ground pool is really your best bet because above-ground pools will eventually need to be replaced.

Labor

There is a lot more labor involved with above-ground pools that are taken down at the end of every season because the following year you have to construct them all over again. If you don’t mind the labor, the affordable above-ground pools available are a great option.

There are also sturdy above-ground pools that can be permanently set in your yard without the need to take them down and put them back up each year. You will need to drain out or treat the water, though, and keep it covered tightly throughout the rest of the year, just as you would an in-ground pool.

Both in-ground and permanent above-ground pools can either be drained and thoroughly cleaned at the end of each season, or you can tightly seal them at the end of the summer. If you use a mesh cover, you will need to continue treating the water throughout the winter with chemicals and the pumps turned on so that it is ready to go when the next summer season arrives. If you use a solid cover instead, you can winterize all of the equipment and add the chemicals and chlorine necessary to last throughout the winter instead.

Space

In-ground pools take up a lot more space in your backyard. Above-ground pools, on the other hand, come in a variety of sizes to suit your preferences and needs. If you do not have a lot of space, or you want to give yourself extra space by taking down your small above-ground pool when you are done with it, it would be best to avoid an in-ground pool.

In-ground and above-ground pools both come with their sets of benefits and drawbacks. Your choice between the two will depend upon the amount of money you have for a pool, the amount of space in your yard, and your expectations for its maintenance.

Derek Tyler is an architect by profession and he enjoys writing articles that mainly focus on landscape design. He enjoys sharing his extensive knowledge and he is currently a consultant at B-Rod Pools in Westport.

Incorporating Reclaimed Wood into your Home or Apartment


Notice: Trying to access array offset on value of type null in /dom694484/wp-content/plugins/seo-image/seo-friendly-images.class.php on line 713

Notice: Trying to access array offset on value of type null in /dom694484/wp-content/plugins/seo-image/seo-friendly-images.class.php on line 713

Notice: Trying to access array offset on value of type null in /dom694484/wp-content/plugins/seo-image/seo-friendly-images.class.php on line 713

Notice: Trying to access array offset on value of type null in /dom694484/wp-content/plugins/seo-image/seo-friendly-images.class.php on line 715

Notice: Trying to access array offset on value of type null in /dom694484/wp-content/plugins/seo-image/seo-friendly-images.class.php on line 715

Notice: Trying to access array offset on value of type null in /dom694484/wp-content/plugins/seo-image/seo-friendly-images.class.php on line 718

Notice: Trying to access array offset on value of type null in /dom694484/wp-content/plugins/seo-image/seo-friendly-images.class.php on line 718

Notice: Trying to access array offset on value of type null in /dom694484/wp-content/plugins/seo-image/seo-friendly-images.class.php on line 885

Notice: Trying to access array offset on value of type null in /dom694484/wp-content/plugins/seo-image/seo-friendly-images.class.php on line 886

Notice: Trying to access array offset on value of type null in /dom694484/wp-content/plugins/seo-image/seo-friendly-images.class.php on line 887

Notice: Trying to access array offset on value of type null in /dom694484/wp-content/plugins/seo-image/seo-friendly-images.class.php on line 888

Notice: Trying to access array offset on value of type null in /dom694484/wp-content/plugins/seo-image/seo-friendly-images.class.php on line 889

With more companies and contractors seeking LEED certification, it’s not uncommon to see the use of reclaimed wood in remodels and new buildings. What a lot of people don’t know is that it’s simple to use this earth-friendly material in a home or apartment. From reclaimed hardwood flooring to simple crafts, reclaimed lumber isn’t just beneficial for the environment and a green solution for your space – it’s also an investment that’s full of character.

About Reclaimed Wood

Reclaimed lumber comes from objects that have had a previous life, such as barns, shipping palettes or wine casks. After the wood has been salvaged, dried and milled, professionals turn it into new products you can use in your home.

Alternatively, DIY enthusiasts can source reclaimed wood from garage sales, thrift stores, classified ads or retailers that sell salvaged building supplies. If you wish to go the DIY route, be picky about the wood you choose. Always look for lumber that was never chemically treated so you don’t get exposed to toxins. Also, carefully inspect the wood for signs of insects so you don’t introduce unwanted pests into your home.

Incorporating Reclaimed Wood into Your Home

Using reclaimed lumber in your home design is simple, as many designers and contractors offer affordable reclaimed wood options. When working on a wood craft of your own, there’s a good chance you can replace virgin wood from the hardware store with reclaimed wood. Here are some ideas:

Reclaimed Wood Floors

Reclaimed hardwood flooring

One of the main advantages reclaimed lumber has over newly harvested wood is its strength, durability and extra resistance to moisture (because it’s drier and comes from old-growth trees). Consider using reclaimed hardwood flooring in the shared living areas of your home. The unique patina of the lumber, and the variety of available shades, make it possible to perfectly complement your home’s décor.

Decks

Some types of reclaimed lumber resist the elements so well you can use them to build or resurface a deck. Consider incorporating old beams into steps and built-in benches.

Wood veneer panels

Veneer panels made out of reclaimed redwood provide an affordable option that gives you the look of solid wood at a fraction of the cost. Because the panels are more stable than virgin wood, they’re less prone to the effects of humidity and alternating temperatures. Wood panels are ideal for:

  • Walls
  • Casework
  • Frames
  • Cabinetry
  • Doors

Flower boxes and raised beds

With some old shipping pallets and basic building supplies, you can make simple flower boxes and raised garden beds over the weekend.

Cutting board

If you have the know-how, use untreated hardwood (stay away from soft timbers) to make a unique cutting board. If saws and sandpaper aren’t for you, check out stores that sell kitchenware, as many now offer reclaimed wood products such as wine racks and salad tongs.

Birdhouses

Another great weekend project, birdhouses are simple to make (especially with kids).

Reclaimed Wood Frames

Picture frames 

You don’t need many materials to make yourself some amazing picture frames from reclaimed wood. If the wood has an interesting pattern, use a light stain on it.

The use of reclaimed wood is a design trend that’s here to stay. By incorporating this eco-friendly material into your home, you help reduce deforestation and keep perfectly usable materials out of landfills. Talk to a dealer who specialized in reclaimed wood to learn more about its uses and benefits.

Author Bio:

This post was contributed by Viridian Reclaimed Wood, a reclaimed wood flooring, paneling and furniture salvaging and materials company based in Portland, Oregon. Viridian focuses on using environmentally responsible raw materials and manufacturing processes to build products that last generations  and than can in turn be easily reclaimed at the end of their life cycle.

5 Important Tips To Keep In Mind When You’re Renovating The Basement


Notice: Trying to access array offset on value of type null in /dom694484/wp-content/plugins/seo-image/seo-friendly-images.class.php on line 713

Notice: Trying to access array offset on value of type null in /dom694484/wp-content/plugins/seo-image/seo-friendly-images.class.php on line 713

Notice: Trying to access array offset on value of type null in /dom694484/wp-content/plugins/seo-image/seo-friendly-images.class.php on line 713

Notice: Trying to access array offset on value of type null in /dom694484/wp-content/plugins/seo-image/seo-friendly-images.class.php on line 715

Notice: Trying to access array offset on value of type null in /dom694484/wp-content/plugins/seo-image/seo-friendly-images.class.php on line 715

Notice: Trying to access array offset on value of type null in /dom694484/wp-content/plugins/seo-image/seo-friendly-images.class.php on line 718

Notice: Trying to access array offset on value of type null in /dom694484/wp-content/plugins/seo-image/seo-friendly-images.class.php on line 718

Notice: Trying to access array offset on value of type null in /dom694484/wp-content/plugins/seo-image/seo-friendly-images.class.php on line 885

Notice: Trying to access array offset on value of type null in /dom694484/wp-content/plugins/seo-image/seo-friendly-images.class.php on line 886

Notice: Trying to access array offset on value of type null in /dom694484/wp-content/plugins/seo-image/seo-friendly-images.class.php on line 887

Notice: Trying to access array offset on value of type null in /dom694484/wp-content/plugins/seo-image/seo-friendly-images.class.php on line 888

Notice: Trying to access array offset on value of type null in /dom694484/wp-content/plugins/seo-image/seo-friendly-images.class.php on line 889

Do you ever feel like your home is shrinking a little bit more every year? The four walls seem to be getting physically closer even though that is impossible. Maybe you’ve just been living in the same place for far too long and you need somewhere a bit bigger, or it could be that you’ve bought so much new things over the years without throwing most of the old stuff out. Either way your home isn’t as big as you’d like it to be and if you don’t solve the problem you will have to move out.

The first thing you might end up doing is throwing out a lot of your furniture because you think it will help. Maybe it will, but what if it doesn’t? What will you do if your home needs to be bigger? An easy solution is to turn the basement into a new room and it also happens to be one of the best things you can do. It’s almost the same as moving into a new home that has one extra room. If this is something that interests you we can look into some of the things you should consider.

Sort out the Dampness

Before you can start any work you need to repair the area you are going to be working on otherwise it will cost you more money in the long-run. You won’t appreciate having to put up new walls because water burst through and damage everything. Check very carefully to see if there are cracks appearing on the walls because it’s a sign that water is ready to come through. There also shouldn’t be damp patches and both of these problems need to be fixed before you start anything.

Use the Right Materials

If you’re going to do any work inside the basement the materials you choose could save you a lot of problems. Just because you deal with any signs of leaks before you begin doesn’t mean nothing bad will happen in the future. By using waterproof materials you will prevent any little problems from turning into big disasters. If you’re not carrying out the work yourself make sure the company is doing it right because they might try to save money and you will suffer.

Good Flooring

Your basement floor will be pure concrete and very uncomfortable to walk on. If you were remodeling your living room would you ever use a concrete floor? I don’t think you would, so you shouldn’t leave the basement that way if you’re going to be using the room a lot. The easiest thing you can do is lay some wooden flooring because it’s stylish and a pleasure to walk on. You’re only laying it in one room so it’s not going to be too expensive.

You Need More Light

Basements have a reputation for being dark and dingy because they usually are. It’s not very often you find a basement that has amazing lighting that brightens every corner of the room up, but if someone is living inside your new room or you use it a lot there needs to be adequate lighting. If you only have enough room at the moment for a little light in the middle of the ceiling you will need to call an electrician out so he can work his magic.

Ghastly Ducts and Beams

There is a good chance you will have lots of ducts and beams getting in your way, but luckily you can stop them from looking so ghastly. You just need to make sure they blend in with the rest of the room. That might mean you have to give them a good paint so they match the color of the ceiling, or instead you might want to paint them a completely different color so they stand out, only they will now stand out in a good way.

Linda Brown is a home improvement blogger who is likely to spend most of her time doing DIY renovations. She also works part-time for PowerVac, a complete cleaning supplies provider in Western Australia.